The Z-axis movement is a critical component of any 3D printing process, as it determines the vertical resolution and speed at which layers are deposited. In many 3D printers, the Z-axis controls the height at which the print head or bed moves, allowing for the creation of complex geometries and fine details. However, the speed and precision of this movement can significantly impact the overall quality and efficiency of the print. This section will explore how optimizing the Z-axis travel speed can lead to better prints and faster production times.
One of the primary challenges in 3D printing is balancing speed with quality. A common misconception is that increasing the Z-axis travel speed will always result in faster prints. While this may be true in some cases, it often comes at the cost of print quality. To achieve both high speed and high quality, it is essential to carefully calibrate the Z-axis movement. By fine-tuning parameters such as step size, acceleration, and deceleration, you can ensure that the Z-axis moves smoothly and accurately, reducing the risk of layer misalignment and other defects.
Additionally, using advanced firmware and software can help optimize the Z-axis travel speed. For example, some 3D printer firmware allows for dynamic adjustment of the Z-axis speed based on the complexity of the model being printed. This means that the printer can slow down for intricate details and speed up for simpler sections, ensuring that the final product is both accurate and efficient.
Vibration and noise are common issues in 3D printing, particularly when the Z-axis is moving at high speeds. These problems can not only affect the print quality but also create an unpleasant working environment. To mitigate these issues, several techniques can be employed:
By implementing these techniques, you can achieve a more stable and quieter Z-axis movement, leading to better print quality and a more pleasant user experience.
While the Z-axis is crucial for vertical resolution, the X-axis movement is equally important for horizontal resolution and overall print speed. Integrating the movements of both axes can lead to significant improvements in print efficiency. One approach is to use synchronized motion control, where the X-axis and Z-axis movements are coordinated to minimize idle time and maximize throughput.
For example, during the printing of a complex part, the X-axis can be programmed to move to the next position while the Z-axis is still completing its movement. This overlap in motion can reduce the overall print time without compromising on quality. Additionally, using advanced slicing software that can generate optimized G-code for both axes can further enhance the efficiency of the print process.
Another technique is to implement adaptive feed rates, where the speed of the X-axis and Z-axis is adjusted dynamically based on the geometry of the part. This ensures that the printer operates at the optimal speed for each section of the print, resulting in faster and more consistent prints.
Optimizing the Z-axis travel speed is a multifaceted challenge that requires a combination of hardware, software, and mechanical adjustments. By understanding the importance of Z-axis movement and employing advanced techniques to reduce vibration, noise, and idle time, you can achieve both high-quality prints and improved production efficiency. Whether you are a hobbyist or a professional, these strategies can help you get the most out of your 3D printer and take your printing to the next level.
 24/06/2026
In the ever-evolving landscape of industrial automation and robotics, the advancements in X-axis actuators have played a pivotal role in enhancing overall system performance. This technical report delves into the recent innovations in X-axis actuators, fo
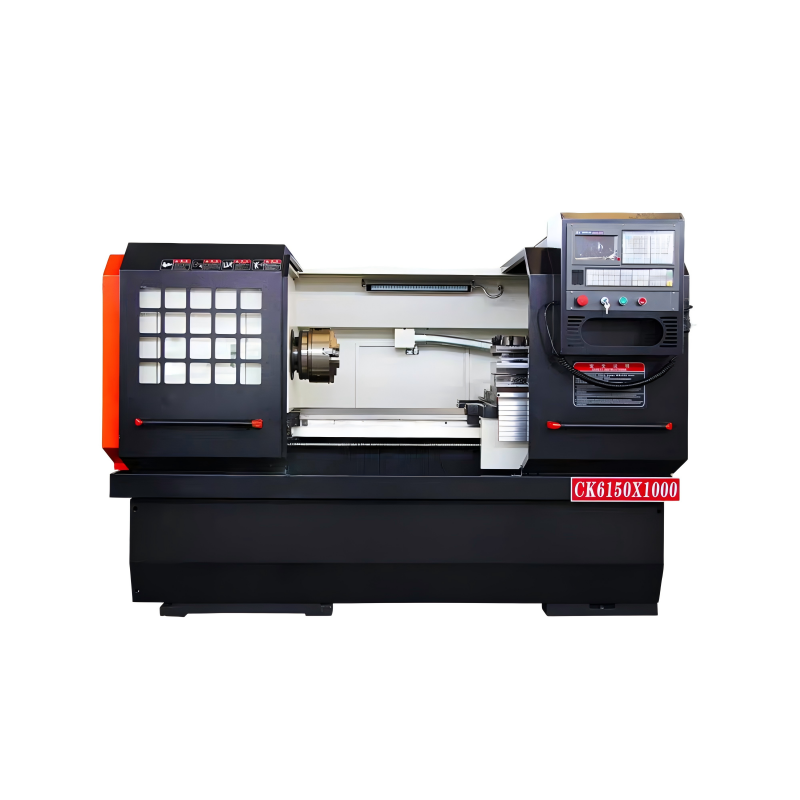
Read More23/06/2026In the realm of precision engineering, the 2-Axis Slant Bed CNC Lathe stands out as a versatile and efficient tool. This comprehensive guide delves into the intricacies of its features, with a particular focus on the X-axis and Z-axis movement, which are
Read More23/06/2026In the realm of 3D printing, the ability to control and manipulate the X-axis and Z-axis movement is fundamental to achieving high-quality prints. This report delves into the specific role of Z-axis movement within 3D printing processes, exploring its imp
Read More23/06/2026Introduction to Z-axis Control in Precision Machining In the realm of precision machining, achieving a superior surface finish is paramount. The quality of the final product often hinges on the ability to control the movement and positioning of the cuttin
Read More23/06/2026In the world of 3D printing, precision and accuracy are paramount. The quality of a print can be significantly influenced by the movement along different axes, particularly the X-axis and Z-axis. Understanding how X-axis motion affects your prints is cruc
Read More22/06/2026In the realm of robotics, understanding the dynamics of X-axis movement is fundamental to designing efficient and precise machines. The X-axis, along with the Y and Z axes, forms the basis of a three-dimensional coordinate system that defines the position
Read More22/06/2026In the realm of precision engineering, Computer Numerical Control (CNC) machining stands out as a cornerstone for producing components with exact specifications. The importance of Z-axis precision in CNC machining cannot be overstated, especially when con
Read More22/06/2026Understanding the intricacies of 3D printing technology, particularly the dynamics of X-axis and Z-axis movement, is crucial for optimizing print quality, speed, and overall efficiency. In this technical report, we will delve into the mechanisms that gove
Read MoreOur professional sales team is always ready to assist you.